Repotting aloe vera plant is crucial to promoting its growth and maintaining its health. This guide will walk you through why it’s important, how to recognize the right time to repot and provide step-by-step instructions to ensure a successful repotting process. Additionally, you’ll learn about common mistakes to avoid and tips to minimize transplant shock, ensuring your aloe vera thrives in its new environment.
Table of Content
- Why Repotting Aloe Vera Plant is Important
- Signs That Your Aloe Vera Plant Needs to be Repotted
- Best Time for Repotting Aloe Vera Plants
- Steps to Repotting Your Aloe Vera Plant
- Tips for Minimizing Transplant Shock During Repotting
- Common Mistakes to Avoid When Repotting Your Aloe Vera Plant
- Frequently Asked Questions
- Conclusion
Why Repotting Aloe Vera Plant is Important
Repotting aloe vera plant is essential for several reasons:
Root Health and Space: Aloe vera plants can outgrow their pots, leading to cramped roots. Repotting provides more space for the roots to grow, ensuring better overall health of the Plant.
Soil Refreshment: Over time, soil can deplete nutrients. Repotting allows you to provide fresh, nutrient-rich soil, which can help your aloe vera thrive.
Water Drainage: Proper drainage is crucial for aloe vera plants, as they are prone to root rot if they sit in waterlogged soil. Repotting allows you to ensure that the pot has adequate drainage and that the soil mix is appropriate for the Plant’s needs.
Disease and Pest Control: Repotting is an excellent time to check for diseases and pests. If you find any, you can take steps to treat the Plant and use fresh soil to reduce the risk of re-infestation.
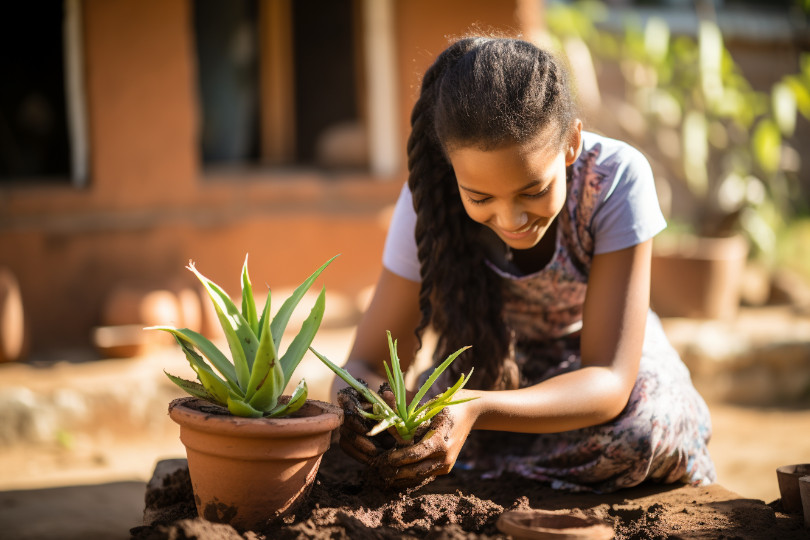
Propagation: If your aloe vera has produced pups or offshoots, repotting is the perfect time to separate these babies from the mother plant, allowing them to grow independently.
Signs That Your Aloe Vera Plant Needs to be Repotted


Recognizing the signs that your aloe vera plant needs repotting is critical to maintaining its health. Here are some common indicators:
Roots are Visible or Crowded: If you see roots growing through the drainage holes at the bottom of the aloe vera planter or if the roots are tightly wound in a circle inside the pot, it’s a sign that the Plant has outgrown its current space.
Water Drains Too Quickly or Not at All: When water either passes straight through the pot without soaking in or sits on the surface without draining, it can indicate that the soil is either too compacted or the roots have taken up too much space, both of which are signs that repotting is necessary.
Plant Looks Top-Heavy or Unstable: If the aloe vera looks about to tip over or has grown disproportionately large compared to its pot, it needs more space to balance its growth.
Slowed Growth or No Growth: A noticeable slowdown or a complete halt can indicate that the Plant has used up all available resources in its current pot.
Pot is Cracking or Breaking: A pot that is cracking or breaking under the pressure of an expanding root system is a clear sign that your aloe vera needs more room.
Yellowing or Drooping Leaves: While this can signify various issues, including overwatering or under-watering, it can also suggest that the Plant is root-bound and needs repotted.
Soil Condition: If the soil looks depleted, dry, or overly compacted and doesn’t hold moisture well, it’s a good idea to repot the Plant with fresh, nutrient-rich soil.
When you notice these signs, plan to report your aloe vera during its active growing season, typically in the spring or early summer. This timing helps the Plant recover quickly and resume healthy growth in its new pot.
Best Time for Repotting Aloe Vera Plants
The ideal time to transfer your aloe vera plant to a new pot is when it grows actively, usually in the spring or early summer. This is the best time to do so for several reasons.:
Active Growth: During spring and early summer, aloe vera plants are usually entering or amid their growth phase. Repotting at this time takes advantage of their natural growth cycle, allowing them to recover from the repotting stress more quickly and resume growing in their new pot.
Better Root Development: The warmer temperatures and longer daylight hours in these seasons promote better root development. After repotting, this helps the Plant to establish itself more effectively in its new container.
Reduced Stress for the Plant: Repotting can be stressful for plants. Doing it during their active growth period ensures they have the energy and resources to adapt to the change and heal any root damage that might occur during the process.
Ideal Conditions for Recovery: Spring and early summer generally offer mild weather conditions – not too hot or cold – that are ideal for a plant recovering from repotting.
It’s essential to avoid repotting during the winter months when the Plant is dormant, as this can increase the risk of shock and hinder the Plant’s ability to recover. Additionally, ensure that your aloe vera is not watered immediately before repotting; let the soil dry out a bit, as dry roots are more flexible and less prone to damage.
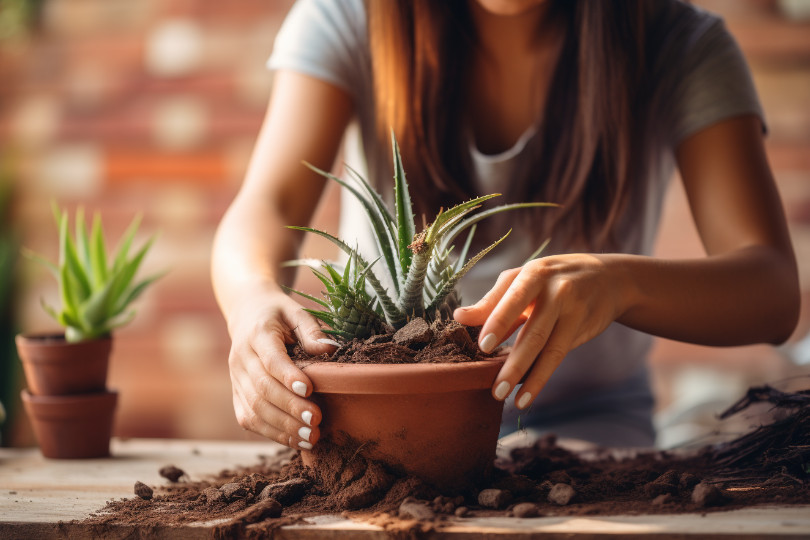
Steps to Repotting Your Aloe Vera Plant
Repotting an aloe vera plant can be done in a few straightforward steps. Here’s a guide to help you through the process:
Choose the Right Pot: Select a pot that is one to two inches larger in diameter than the current one. Ensure it has suitable drainage holes. Terracotta pots are an excellent choice for aloe vera because they allow the soil to dry out more efficiently between waterings.
Prepare the New Potting Mix: Use a well-draining mix, ideally formulated for succulents or cacti. You can also make your mix by mixing sand or perlite in regular potting soil for improved drainage.
Water the Plant Before Repotting (A Few Days in Advance): Water your aloe vera a few days before repotting to ensure it’s hydrated, which helps reduce transplant shock. However, the soil should be dry on the repotting day to make the process easier.
Remove the Plant from the Old Pot: Gently tip the pot on its side and ease it out. If the Plant is stuck, you may need to tap the pot’s sides or gently press on the pot to loosen the soil.
Inspect and Trim the Roots (If Necessary): Inspect the roots once out of the pot. Trim away any dead or excessively long roots. However, be careful not to over-trim, as aloe vera roots are essential for the Plant’s health.
Prepare the New Pot: Place a small amount of your potting mix at the bottom of the new pot. This helps position the Plant at the right height.
Position the Plant in the New Pot: Place your aloe vera in the center of the new pot. The top of the root ball should be about an inch below the pot’s rim, allowing room for watering.
Add Potting Mix Around the Plant: Fill around the Plant with your potting mix, gently tamping down the soil to remove air pockets. Ensure the Plant is secure, but avoid compacting the soil too tightly.
Water the Plant: Once repotted, water the Plant lightly to help settle the soil. Then, wait a week or more before watering again to allow any damaged roots to heal.
Aftercare:
- Place the repotted aloe vera where it will receive plenty of indirect sunlight.
- Avoid direct sunlight for a few days to prevent stress.
- Resume your regular watering and care routine once the Plant appears to have adjusted to its new pot.
Remember, aloe vera plants prefer to be slightly root-bound, so only rush to report if you see clear signs that it’s necessary. This careful approach will help ensure your aloe vera thrives after repotting.
Tips for Minimizing Transplant Shock During Repotting
Minimizing transplant shock is crucial when repotting plants, including aloe vera. Here are some tips to ensure a smooth transition:
Choose the Right Time: Repot during the Plant’s active growing season, typically in the spring or early summer. This is when the Plant is most resilient and able to adapt to changes.
Water Properly Before Repotting: Water the Plant a few days before repotting to ensure it’s well-hydrated. However, ensure the soil is dry on the repotting day to make the process easier and reduce root damage.
Be Gentle with Roots:
- Handle the roots with care.
- Keep the root ball intact as much as possible when removing the Plant from its old pot.
- If you need to trim the roots, do so sparingly and gently.
Use the Right Soil: Use a well-draining potting mix suitable for aloe vera, like a cactus or succulent mix. This ensures the Plant has the right environment for growth post-repotting.
Avoid Deep Planting: When placing the Plant in the new pot, ensure it sits at the same depth as in its previous pot. Planting it too deeply can cause stem rot.
Minimize Exposure to Direct Sunlight: After repotting, keep the Plant in a shaded or indirectly lit area for a few days to a week. This helps the Plant adjust without the added stress of intense light.
Delay Watering Post-Repotting: Wait a week before watering the Plant again after repotting. This gives damaged roots time to heal, reducing the risk of rot.
Avoid Fertilizing Immediately: Don’t fertilize right after repotting. The Plant needs time to adjust to its new environment. Wait for at least a month before introducing any fertilizers.
Maintain a Stable Environment: Keep the Plant stable with consistent temperatures and humidity. Avoid placing it in areas with drafts or extreme temperature fluctuations.
Monitor Plant Health: Monitor your Plant for the first few weeks after repotting. Signs of stress, like wilting or discoloration, should be addressed promptly.
Be Patient: Some plants take a while to show new growth after being repotted. Be patient and give your aloe vera time to adjust and recover from the transplant shock.
Gradual Introduction to Normal Conditions: Once your Plant seems to have recovered, gradually reintroduce it to its regular light conditions. This gradual transition helps the Plant acclimate without undergoing additional stress.
By following these tips, you can significantly reduce the impact of transplant shock on your aloe vera plant, helping it to recover more quickly and continue thriving in its new pot.
Common Mistakes to Avoid When Repotting Your Aloe Vera Plant
Avoiding common mistakes can significantly enhance the success of repotting your aloe vera plant. Here are some critical errors to avoid:
Using the Wrong Soil Type: Aloe vera requires well-draining soil, typically a cactus or succulent mix. Using regular potting soil without amendments for drainage can lead to water retention and root rot.
Choosing an Inappropriately Sized Pot: Repotting into a pot that is too large can lead to excess soil moisture, which is detrimental to aloe vera. The new pot should be larger than the old one.
Over-Watering After Repotting: Water sparingly after repotting and wait for about a week before the first watering. This allows any damaged roots to heal and reduces the risk of root rot.
Damaging the Roots: Be gentle when handling the Plant. Excessive root damage during repotting can stress the Plant and hinder its recovery.
Planting at the Wrong Depth: Plant the aloe vera at the same depth as in the previous pot. Growing it too deep can lead to stem rot, while too shallow planting can cause instability.
Ignoring Plant Health Before Repotting: If the Plant is already stressed, diseased, or infested with pests, these issues should be addressed before repotting.
Exposure to Direct Sunlight Immediately After Repotting: Direct sunlight can stress the Plant immediately after repotting. Please keep it in a shaded or indirectly lit area for a few days.
Neglecting to Loosen the Root Ball: Gently tease the roots apart if they are densely packed or root-bound. This encourages them to grow outward in the new soil.
Using a Pot Without Adequate Drainage: Good drainage is critical. Use a pot with drainage holes to prevent water accumulation.
Fertilizing Too Soon: Avoid fertilizing immediately after repotting. Please wait about a month before introducing fertilizer for the Plant to adjust to its new environment.
By avoiding these common mistakes, you can help ensure a more prosperous and less stressful repotting experience for your aloe vera plant.
Frequently Asked Questions
How do you repot aloe vera cuttings for propagation?
- Let the cuttings end dry and callous over for a few days.
- Plant the cutting in a well-draining soil mix for cacti or succulents.
- Water sparingly until roots develop, then gradually increase watering.
How do you deal with long stems when repotting aloe vera?
- If the stem is healthy, you can bury part of it in the new pot with fresh soil.
- If it’s leggy or weak, consider cutting the top part of the Plant and repotting it as a cutting.
What should you do if your aloe vera plant has no roots during repotting?
- If the Plant is otherwise healthy, let the base dry for a few days to form a callous.
- Then, plant it in dry, well-draining soil and wait for roots to develop, watering minimally.
Do Aloe Plants Need Deep Pots?
- Aloe plants do not necessarily need deep pots. They prefer wider pots as their roots spread horizontally rather than deeply.
- Ensure the pot has sufficient drainage holes at the bottom to avoid water accumulation and root rot.
Conclusion
Repotting your aloe vera plant is essential to its care and ensures its continued health and growth. This process, ideally done during the Plant’s active growing season of spring or early summer, provides essential benefits such as improved root health, refreshed soil, better water drainage, disease control, and the opportunity for propagation.
Recognizing the signs that your aloe vera needs repotting, such as visible or crowded roots, top-heavy growth, or a pot that is cracking, is crucial. The repotting process should be done carefully, choosing the right pot and soil type, being gentle with the roots, and ensuring the Plant is not watered immediately before or after repotting to minimize transplant shock.
Avoid over-watering, using the wrong soil, or choosing an inappropriate pot size. Additionally, understanding how to handle specific situations like propagating cuttings, dealing with long stems, or managing a plant with no roots is essential. Following these guidelines closely and being attentive to your Plant’s needs, you can successfully repot your aloe vera, leading to a healthier and more vibrant plant.